Basic Applique Tutorial
By Michelle of Abigail Michelle
Machine applique is so much fun!
These simple steps will insure you the best result. If you have any questions please let us know. We're happy to help.
1) Hoop your fabric very securely. If the fabric shifts even a little bit in the hoop, the alignment will be off for your design. This is true for filled designs as well as applique.
As a rule: The larger the hoop, the more the fabric will shift around in the hoop. This is because there is more room for the fabric fibers to move around, especially while stitching. The area that actually holds the fabric in place (the edges of the hoop) are farther apart so the area inside the hoop is more susceptible to movement. Using basting stitches in your hoop before stitching your design is a great help as is using an adhesive between your fabric and stabilizer. Use the strongest stabilizer you can for your specific project.
Most embroidery designs are digitized for standard fabrics such as cotton or knit. Heavier fabrics such as heavy denim, towels, leather or outdoor fabric may not work with some designs. Use your judgement when choosing designs for these types of fabric. If you're not sure, ask the designer.
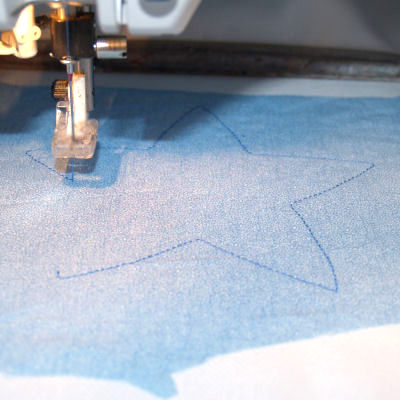
2) The first stitch in an applique area will be the placement stitch. This will show you exactly where you should lay the applique fabric piece. *Even though there are color changes for the first three steps, choose only one color... the color your final satin stitch will be. The color changes on the chart are only to force the machine to stop so you can complete each step.

3) Once this stitch has completed you will see an outline of the design area you need to fill with applique fabric. It is a template. Choose a fabric that will completely cover this area. You don't need to cut it exactly the size or shape of the area, just place a piece of fabric over the entire area.
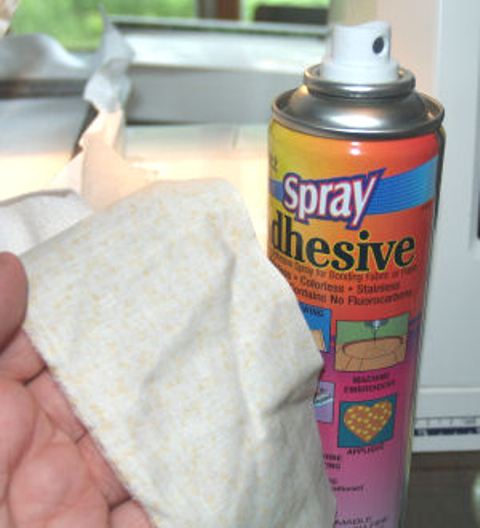
*We recommend using a spray adhesive to lightly cover the wrong side of your applique fabric. There are many different brands on the market. Choose one that is made specifically for machine embroidery. Spray away from your machine and only in a very light coating. Always be sure to spray in a well ventilated area away from children and pets. Follow manufacturers instruction on can.
4) Gently place sticky applique fabric over the outlined area, being sure not to have bubbles or wrinkled areas. Firmly but gently press into place, being careful not to move fabric in hoop.
5) Your next stitch will be your applique tackdown stitch. This thread will repeat the same pattern as the last one, stitching your applique fabric into it's place perfectly.
6) Once it is finished stitching your applique fabric into place and your machine has safely stopped, carefully remove the hoop from the machine. Do NOT remove the fabric from the hoop. Place hoop on a smooth surface, such as a table. Carefully trim excess fabric from around the design area using small, sharp embroidery scissors. Again, be extra careful you do not move the fabric that is inside the hoop. Trim as closely to the stitches as you can without cutting into the stitches or allowing them to pull out from the stitches. We recommend 1/8" or so.

7) Replace hoop onto machine. Your last step will be the satin stitch (or final decorative stitch) around the applique. *Note: Some designs are specially created for a fraying effect. Those designs will not have a satin stitch, however these steps still apply in most cases. Please refer to your specific design chart for details.

8) Complete your design with any other design features that are included, as shown below.
