Multi-layer Applique Tutorial
Multi-Applique Tutorial
by Michelle of Abigail Michelle Embroidery
This tutorial will walk through the steps of a multi-applique design for machine embroidery.
All designs are different, but the same basic ideas apply.
Here I will demonstrate how easy it really is to enjoy embroidery designs with more than one applique fabric involved.
Our example today is a design of a baby dragon.
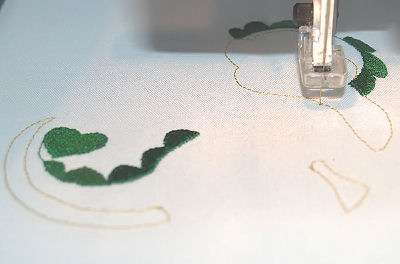
1) Our first step has us stitch out some filled parts in detail.

2) Next, it is showing us where the first applique fabric will be placed. By showing this outline, we will know exactly where it will be placed and how much fabric we will need. This comes in handy when we are working with small scraps of fabric.
3) We can either just lay the applique fabric over the outline and carefully hold it in place while the fabric stitches, or we can lightly spray the wrong side of the applique fabric with an embroidery adhesive. This helps to keep the applique fabric in place while stitching and trimming.
There are many embroidery adhesive products on the market. If you choose to spray, please spray away from your machine, children and pets. Always spray near an open window or some other good ventilation system.

4) Now we can place our first applique fabric over the outline.

5) Resume stitching by pushing the button and as you can see, the machine has now stitched over the outline again, this time catching in the applique fabric completely within it.

6) Remove the hoop from the machine and gently trim around the outline of the applique fabric.
It's important to trim very close to the stitching without cutting the stitches around the outline or any stitches under the fabric (such as the green accent in this design). It is also equally important not to stretch the fabric in the hoop.
Be very gentle while trimming the applique fabric; the hooped project should not shift at all during this process. It is wise to place the entire hoop onto a hard table surface instead of your lap when trimming.
Small, sharp embroidery scissors are very useful for trimming applique fabric and can make it much easier to trim into small areas that may need to be trimmed. Take your time, it will be worth it.
Once it has all been trimmed, replace your hoop back onto your machine.

7) Once all applique pieces have been trimmed around, continue to the next step.

8) The machine is now adding some stitches that will work as an accent to this dragon design. It stitches over the first applique fabric. For this reason, it is important to let the machine stitch in the exact order it calls for.

9) Next, the machine is sealing the raw edges of this applique fabric by running a satin stitch around it. Note that it does not make satin stitches around all raw edges. This is because there are more layers of applique fabric to add that will cover these raw edges later.

10) It's time for our next applique fabric! The body of the dragon has been outlined for us.

11) Add the next applique fabric just as before, using an embroidery adhesive if you like. With the next stitching, the tack down stitch is complete.

12) Remove your hoop again and carefully trim around your applique fabric. Replace the hoop back onto the machine once you are done.

13) At this point, the design calls for some more design accents. What cute toes this baby dragon has! Don't you just love baby toes?

14) The outline of the second applique fabric is next. Notice how the satin stitches also cover some of the raw edges that were left by the first applique fabric.

15-17) Our last applique fabric addition is for the wings. Repeat the same steps for this applique addition as the last two.


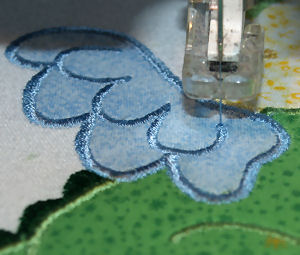
18) With the addition of facial features and accents on his wings and back, he is done!
Great job!
